Dental Documentation Protocol
This is a standardised photo protocol, and some examples of common mistakes that can occur during.

Standardising dental documentation
The more accurate the input, the more predictable the outcome. This is a standardised photo protocol, used on a daily basis by Florin Cofar in the Dentcof clinic.
An accurate documentation has many advantages and the most important ones are:
- files are the key resource in a digitalised world, which without a doubt is the future
- documenting cases develops a critical eye and encourages continuous learning
- the time to take a bad picture is the same as the time it takes to take a good picture. The difference is that a good picture can be used as the building block for digital workflows, lectures, education and even marketing
- creates a health timeline for the patient and allows monitoring changes over time
Here is the information you extract from each type of picture that will help in an accurate planning.
Portrait Photography
Closed mouth
With relaxed muscles of the face, you can observe the alignment of the face. On this picture you can analyse with clarity the philtrum – glabella line and horizontal level of eyes.
Note: Additional portrait pictures taken from a 45 degree angle can give valuable information regarding the position of the condyle and the mandibula in a resting position.

Relaxed Lips
You see the display of the centrals and incisal level in a relaxed position.

Regular Smile
You see the cervical and gingiva display when patient smiles.

Forced Smile
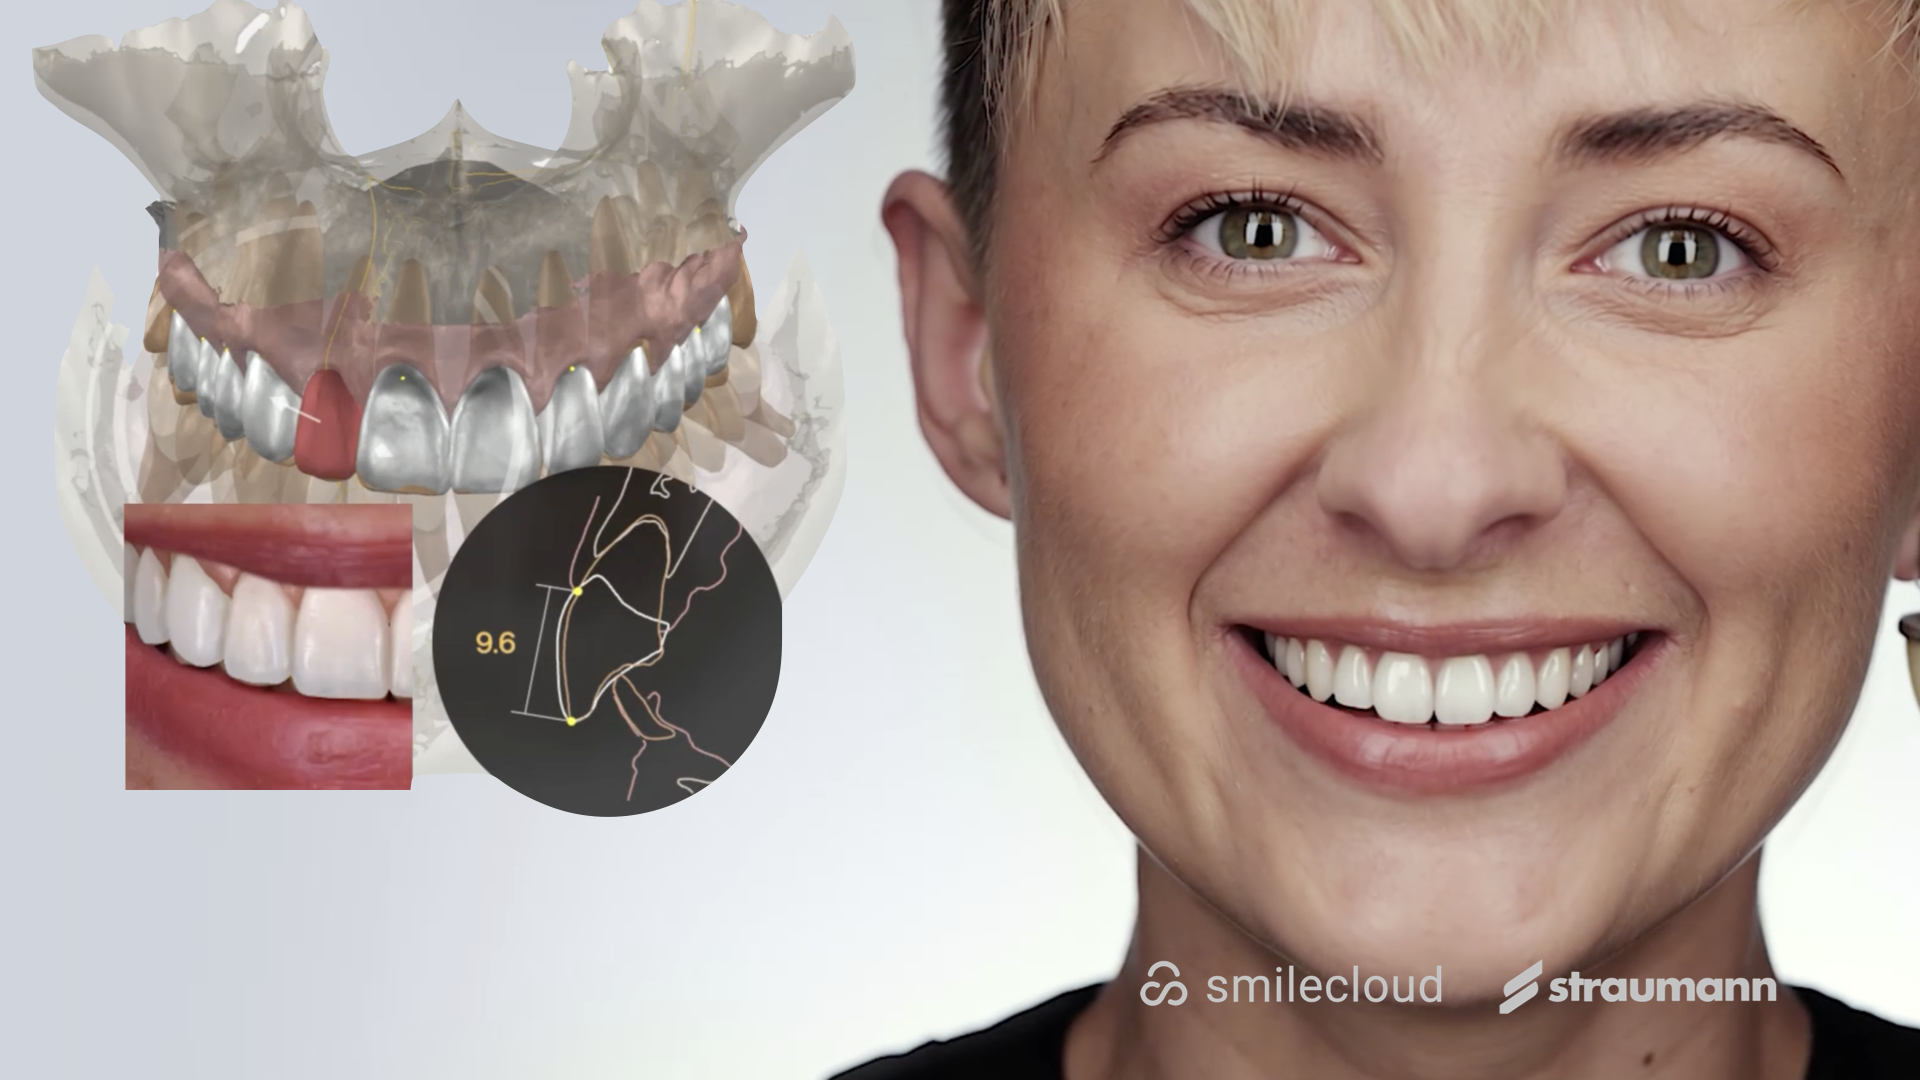
This is the most important picture for 2D Smile Design. In addition to a maximum display of zeniths, gingiva and incisal edges, the forced smile picture, gives you a vital information: the smile curve. Taken correctly, this allows you to plan an aesthetic harmonious design.
For this pictures patient must smile without lips touching teeth. This allows you to see the maximum display of gingiva, zeniths and incisal points that allows you to plan the case accurately and align portrait with intra-oral both in 2D and 3D.

As angulation is key, there are however some common mistakes that create distortions in the real smile curve.


Intra-oral photography
The intra-oral picture gives you a close up view of the restorative space, reference with the lower arch and key information about the bite. The key point for intra-oral pictures is to get the same angulation – the same smile curve as the portrait.
This will allow you to align both views, portrait and intra-oral in both 2D and 3D.


12 O’clock Angle
Gives the dentist and the technician information about the position of the lip on top of teeth and volume of the maxila.

Occlusal pictures
Are helpful to the dentist for documentation but is most important for the technician to asses the existing works (composites, crowns etc) and also gives indication about space distribution on the arch.

Common mistakes to avoid


Digital clone
With this information on hand, you basically have a digital clone of your patient, you can plan in an interdisciplinary matter with colleagues from all parts of the world in a predictable workflow where the patient is not actually present except for when you schedule the procedures.
Technical Reccomendations


Camera settings

Building lasting relationships and customer success
.png)