Dentcof Case Study using Smilecloud
As an introduction, to better explain digital, I will use a different parallel than the standard. Standard comparison used by the industry to explain digital is analogue, because of course, people have common references.
However, this way of explaining digital can be confusing and misleading, so i will use one that I think makes more sense and is unbiased by standardised beliefs. I will relate the digital workflow to Architecture. My wife is an architect. She designed the room of our two boys, and I will use that as the parallel for our topic here.
Data
First and foremost, the idea is in the process and that is what I will relate to. In the beginning, she collects data: measurements of the space, a floor plan, pictures, maybe topography information, whatever is relevant in their field. Never do they go into 3D, although they are the most knowledgeable people in the field. Everything we have in dental, in terms of software, is borrowed from architecture and engineering, what differs is an adapted interface.
2D
Architects never start in 3D, they start in 2D. Why? Because of something called “systematic thinking”. You can imagine any building or dental design as an XYZ equation.
Based on this equation, if you are a surgeon you place an implant, if you are a prosthodontist, a new structure, if you are an orthodontist you move an existing structure, in the coordinates of the horizontal, vertical and sagittal.
You relate the XYZ coordinates of the design to the face, which is aesthetics, to functional envelope which is occlusion, biologic width and principles to get stability.
3D
Whenever you need to solve an XYZ equation you start with 2D. This is what Architects do. They plan the design on paper, divide the space and scale upward as they move forward.
Now it is time to involve the client. An architect will never show him the plan simply because the client will not understand. The same in dentistry. You can’t show the patient a 3D file, because he can not put it into context.
Libraries
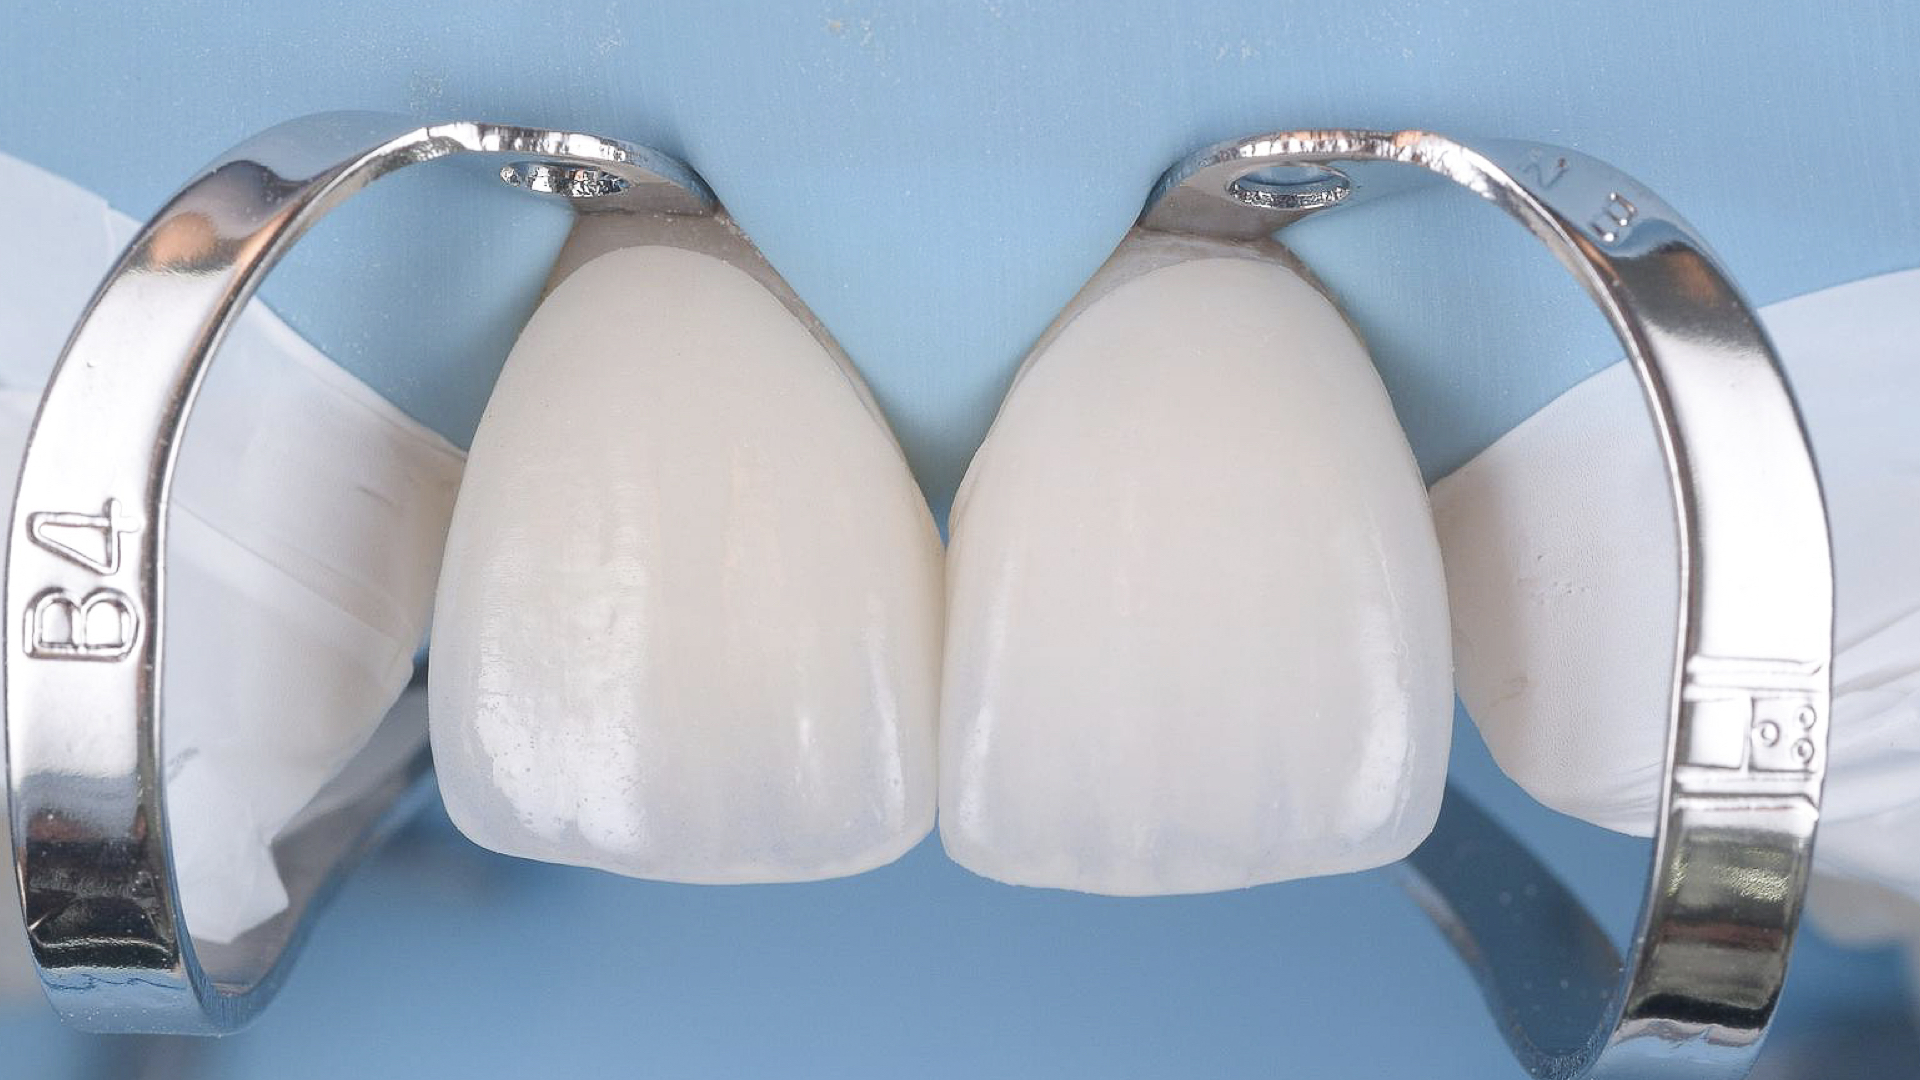
In both architecture and dental an important component of design is the use of libraries. These are collections of 3D objects that you use from a database to create a design and also exist in reality for you to buy. In architecture it is furniture, in dental, libraries are teeth or implant components. They are predefined chunks of information which you can assemble into designs, surgical guides, indirect bonding or direct restorations.
Rendering
When you assemble the project, using libraries, the next step is to render it. Rendering in architecture is done using specialised software to create a photo realistic preview of the end result and planning. This is what you show to the client. This is what he can visually understand and give relevant feedback on.
This is the process that inspired me in dental because we tend to do the same: collect the data (which for us is consultation and should be standardised), plan the case in 2D and move forward step by step to 3D and execution.
Design
In analogue, the atom of design is knowhow. You use this to transform something you imagined into reality using experience, talent, manuality, practice, whether we’re talking about wax-up, provisionals or final restorations. In digital the design process is fundamentally different.
Think about how dentures are made: you select 12 teeth, assemble them using principles of occlusion, retention, aesthetics. In an in edentulous patient you have all the freedom and possibility to do so. Digital design is very similar to this because in both dentures and digital your “workspace” is virtual. You have the freedom to plan and do everything ahead, before executing the actual treatment.
The unit of design in digital, Its atom, is strongly becoming the unique individual shape of a natural tooth. How does this impact the process?
Selection
Design fundamentally is changing into 2 things: Selection of a library, the objects from the database that fit your space, and the positioning of that library into correct XYZ coordinates following occlusion, function and biology principles.
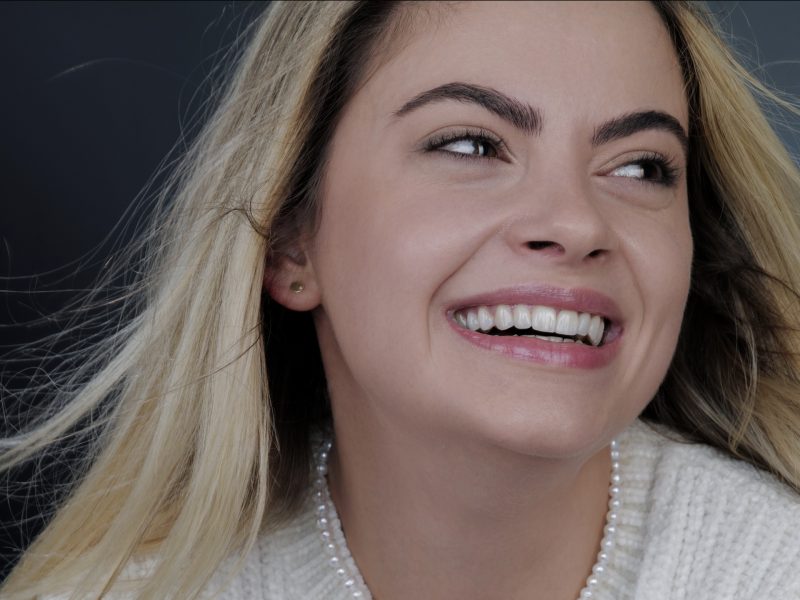
The selection itself is done by the dentist, because among other things, the library is transformed into a virtual mockup, used as a tool for VISUAL communication. This is a language the patient understands allowing you to mitigate from the beginning the time lost because patients don’t know what they want. The second reason why the dentist does this is time. You save your chair time, technicians time for changing multiple wax-ups, what eventually translates into saving costs. At the end of the day, for me as a dentist what is cardinal is to get as much information as possible, and a virtual mockup that takes maybe 5 minutes of my time provides a reasonable amount of information to give to my technician as he is the real designer of the case.
Collection of data
Selection of Library
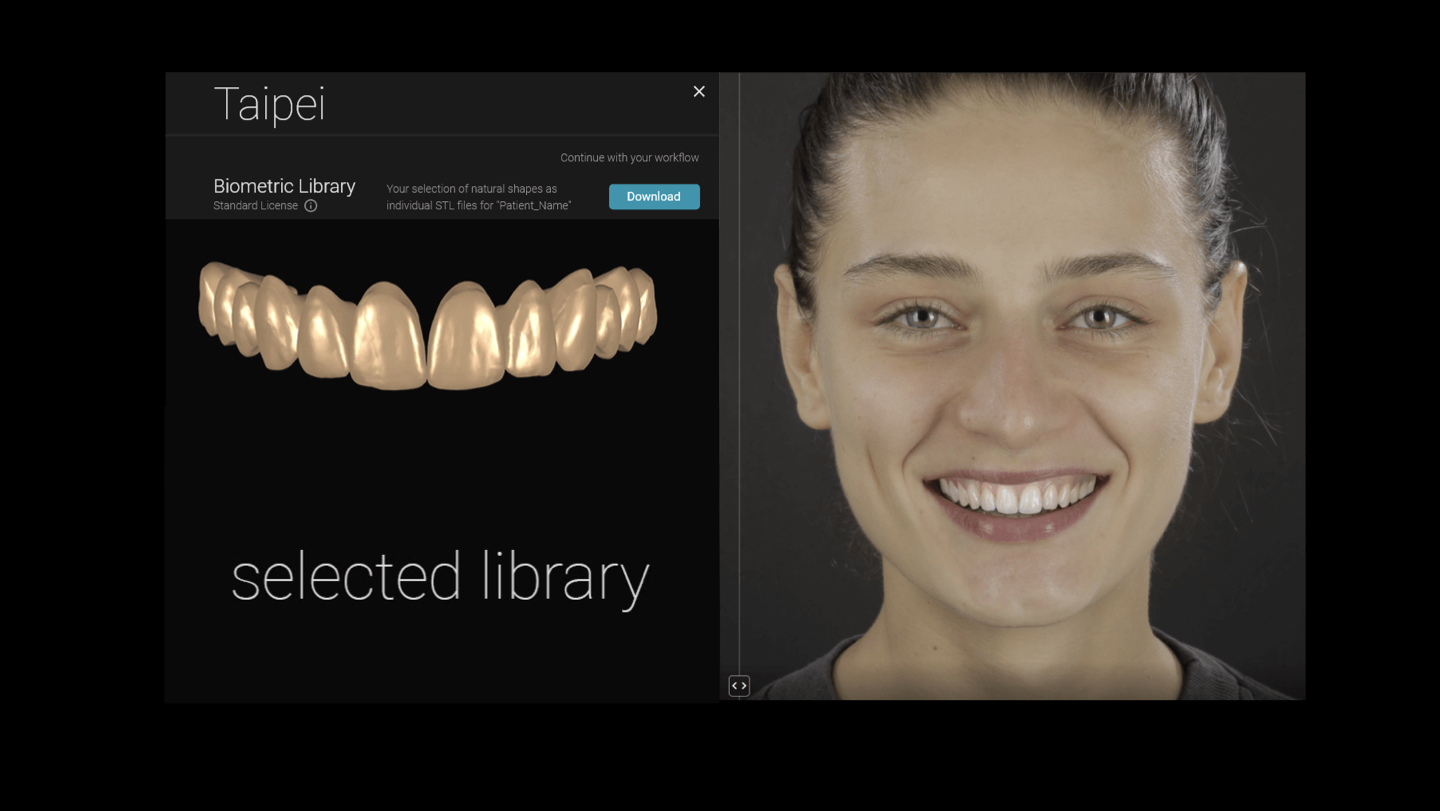
By now we added our data, planned the design, selected the library, visualised it and downloaded the composition. This is the completion of the first step of Design, the Selection.
Positioning
In theory the initial scan plus the selected Library equals design. However, unless your library is the result of a search according to the parameters you need for the case, this equation is a fairytale. In real life, what mostly happens is, people choose a library and then spend hours and hours sculpting that library until it looks completely different from the original one.
What I want to emphasise here is the importance of properly selecting a library according to tissue architecture and proportions in a way that minimises sculpting. I believe that sculpting is the one thing that at the end of the day will take up much time and and it takes away the predictability that we should get from digital dentistry.
When you position the library for design there are two scenarios. If your case is completely additive this is how your equation looks like:
But this is a fairy tale.
We know very well that few cases are fully additive. Most cases are reductive or at least partially reductive which means there will be some areas that you need to reduce if you position the shapes in ideal position.
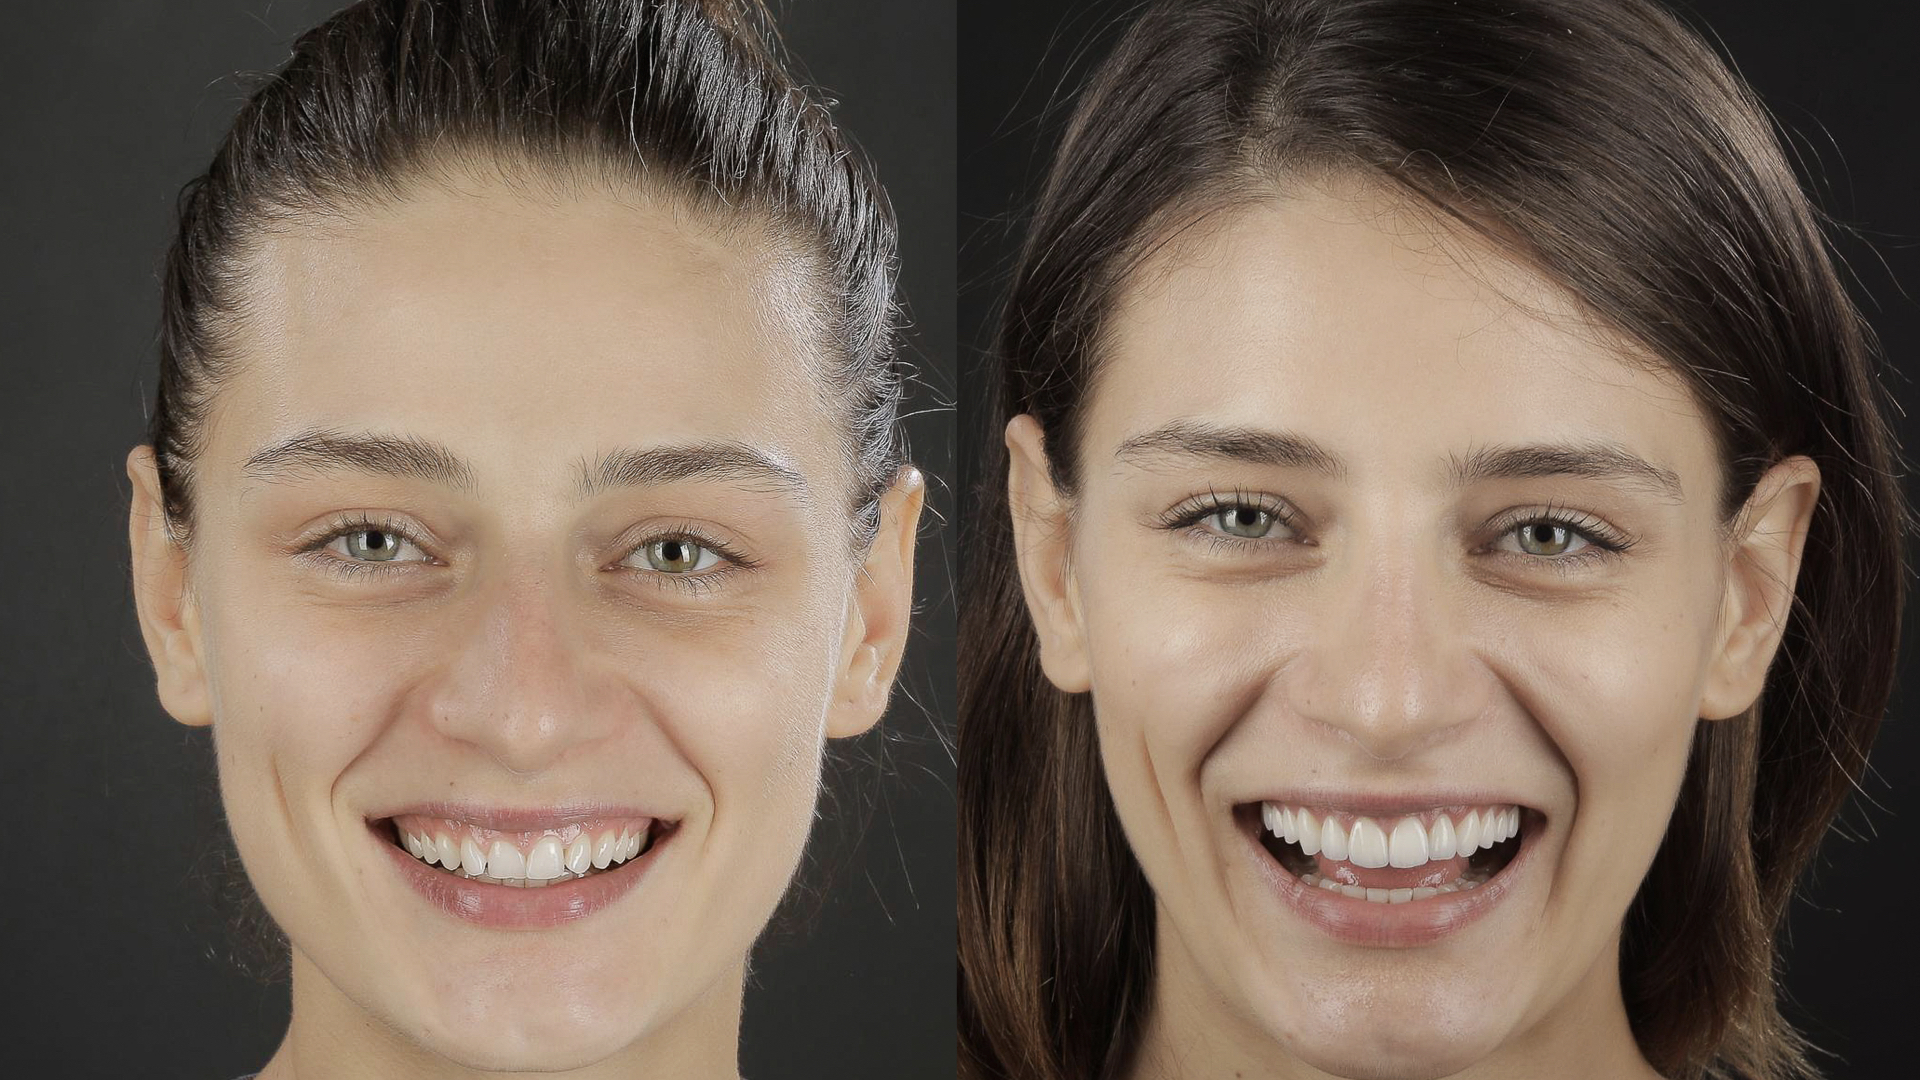
So usually what you would do is position the library on top of teeth and tissue to get a motivational mockup that you print and transfer in the mouth with bisacryl in order to present the case to the patient. But what does this process generate? A picture of the future smile, that you use as a communication tool for case acceptance. But a picture is a 2D, which in fact you had from the beginning when you made the 2D planning. By skipping the Motivational mockup in reductive cases you shortcut the process and avoid the limitations of the motivational mockup. Read more about it here.
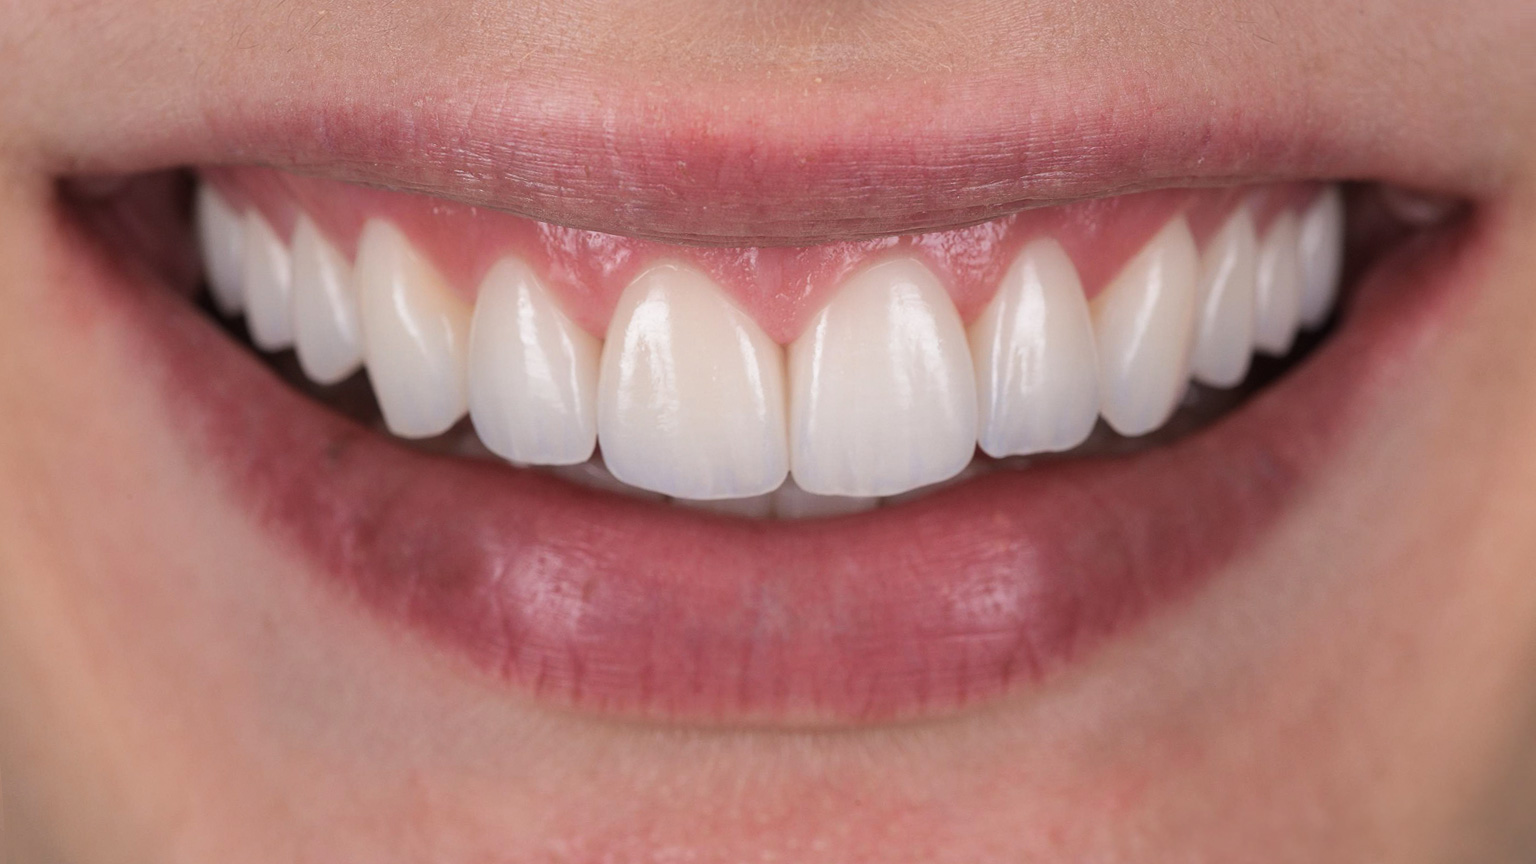
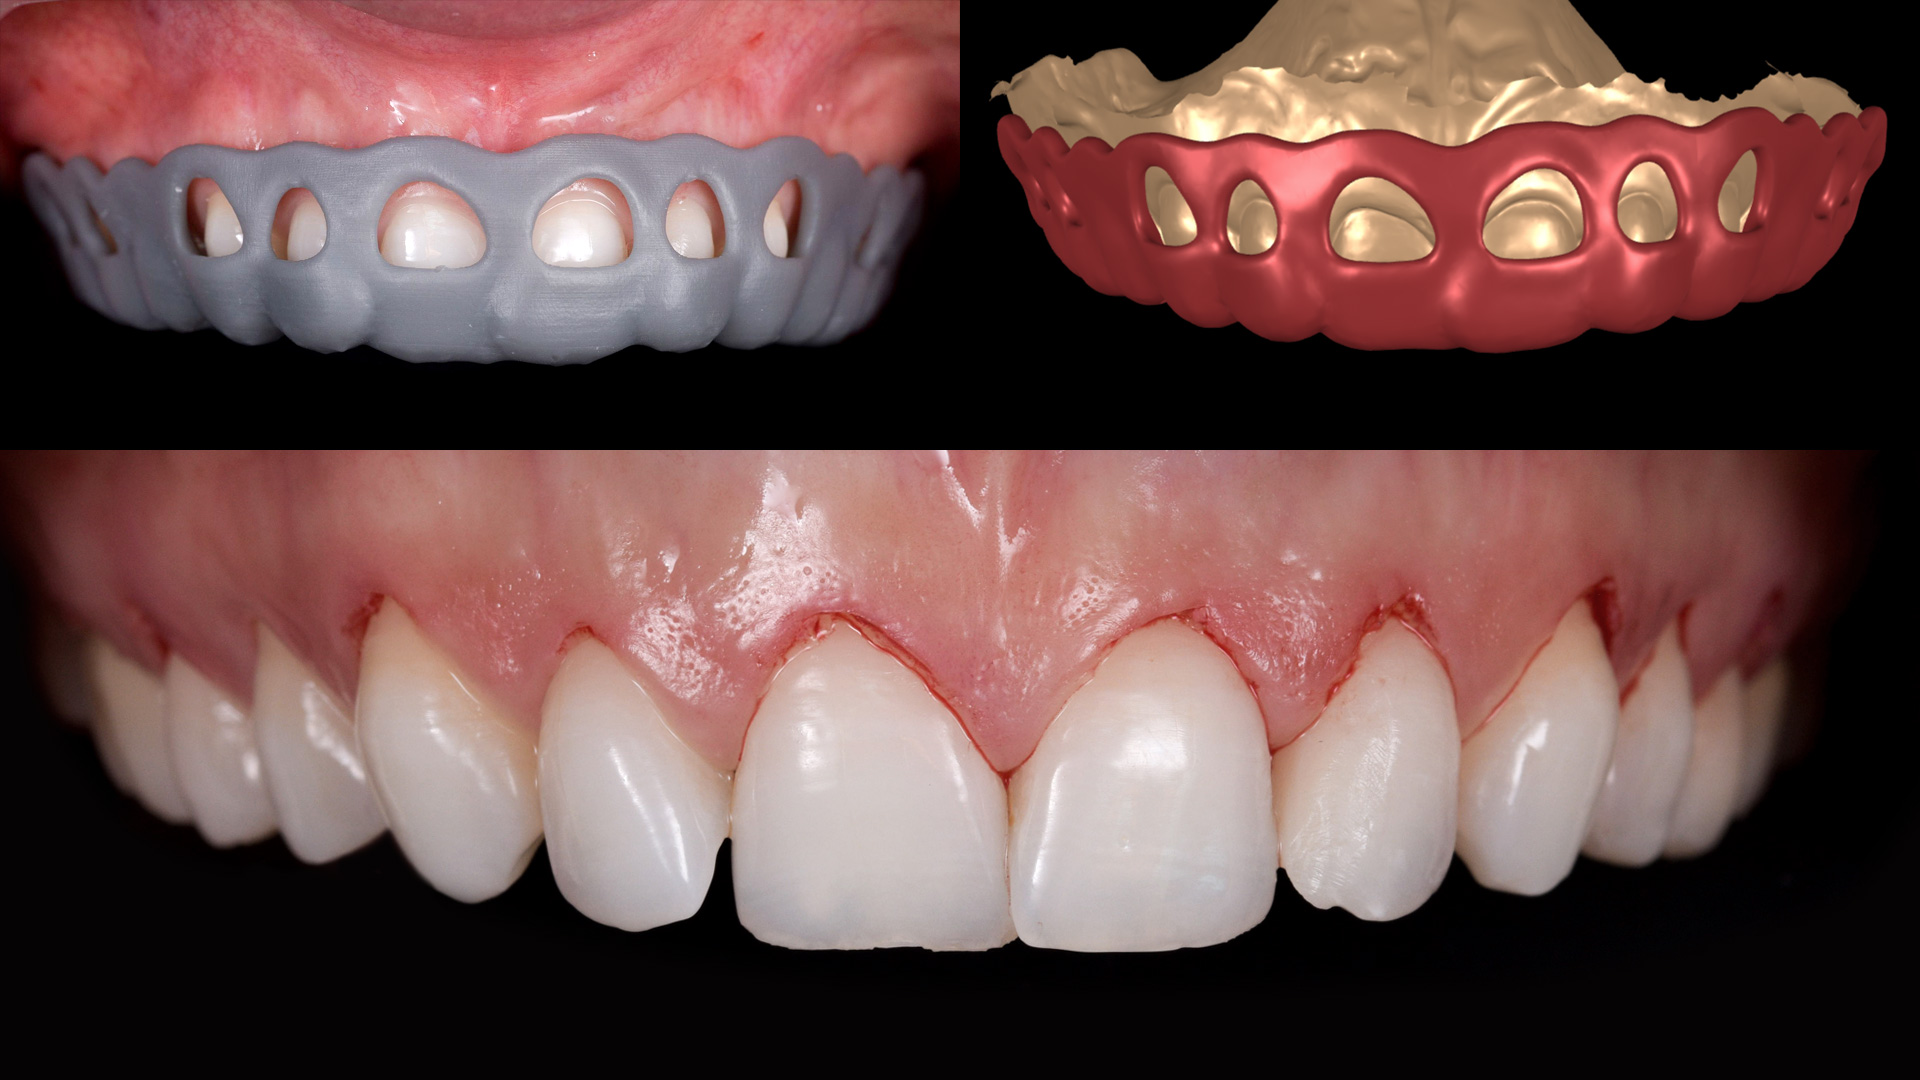
The Ideal Mockup is the only one with clinical relevance and it results from positioning the selected library in the final, functional position. This is the result:
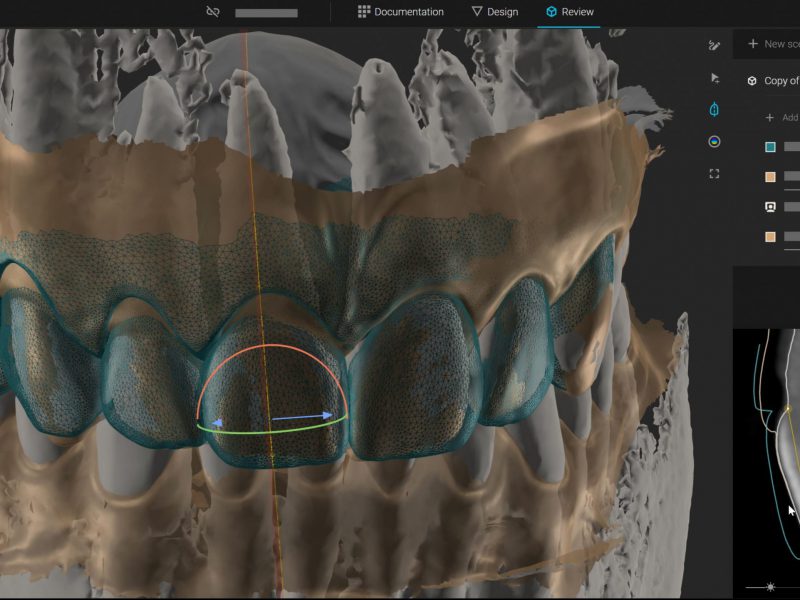
The initial scan and the ideal design are used to create all the guides. For example you can create the soft tissue guide which we use to replicate the cervical part of the chosen shape. This is not necessarily used to correct the canting, but it is used if you want to be accurate in copying the cervical shape you choose.
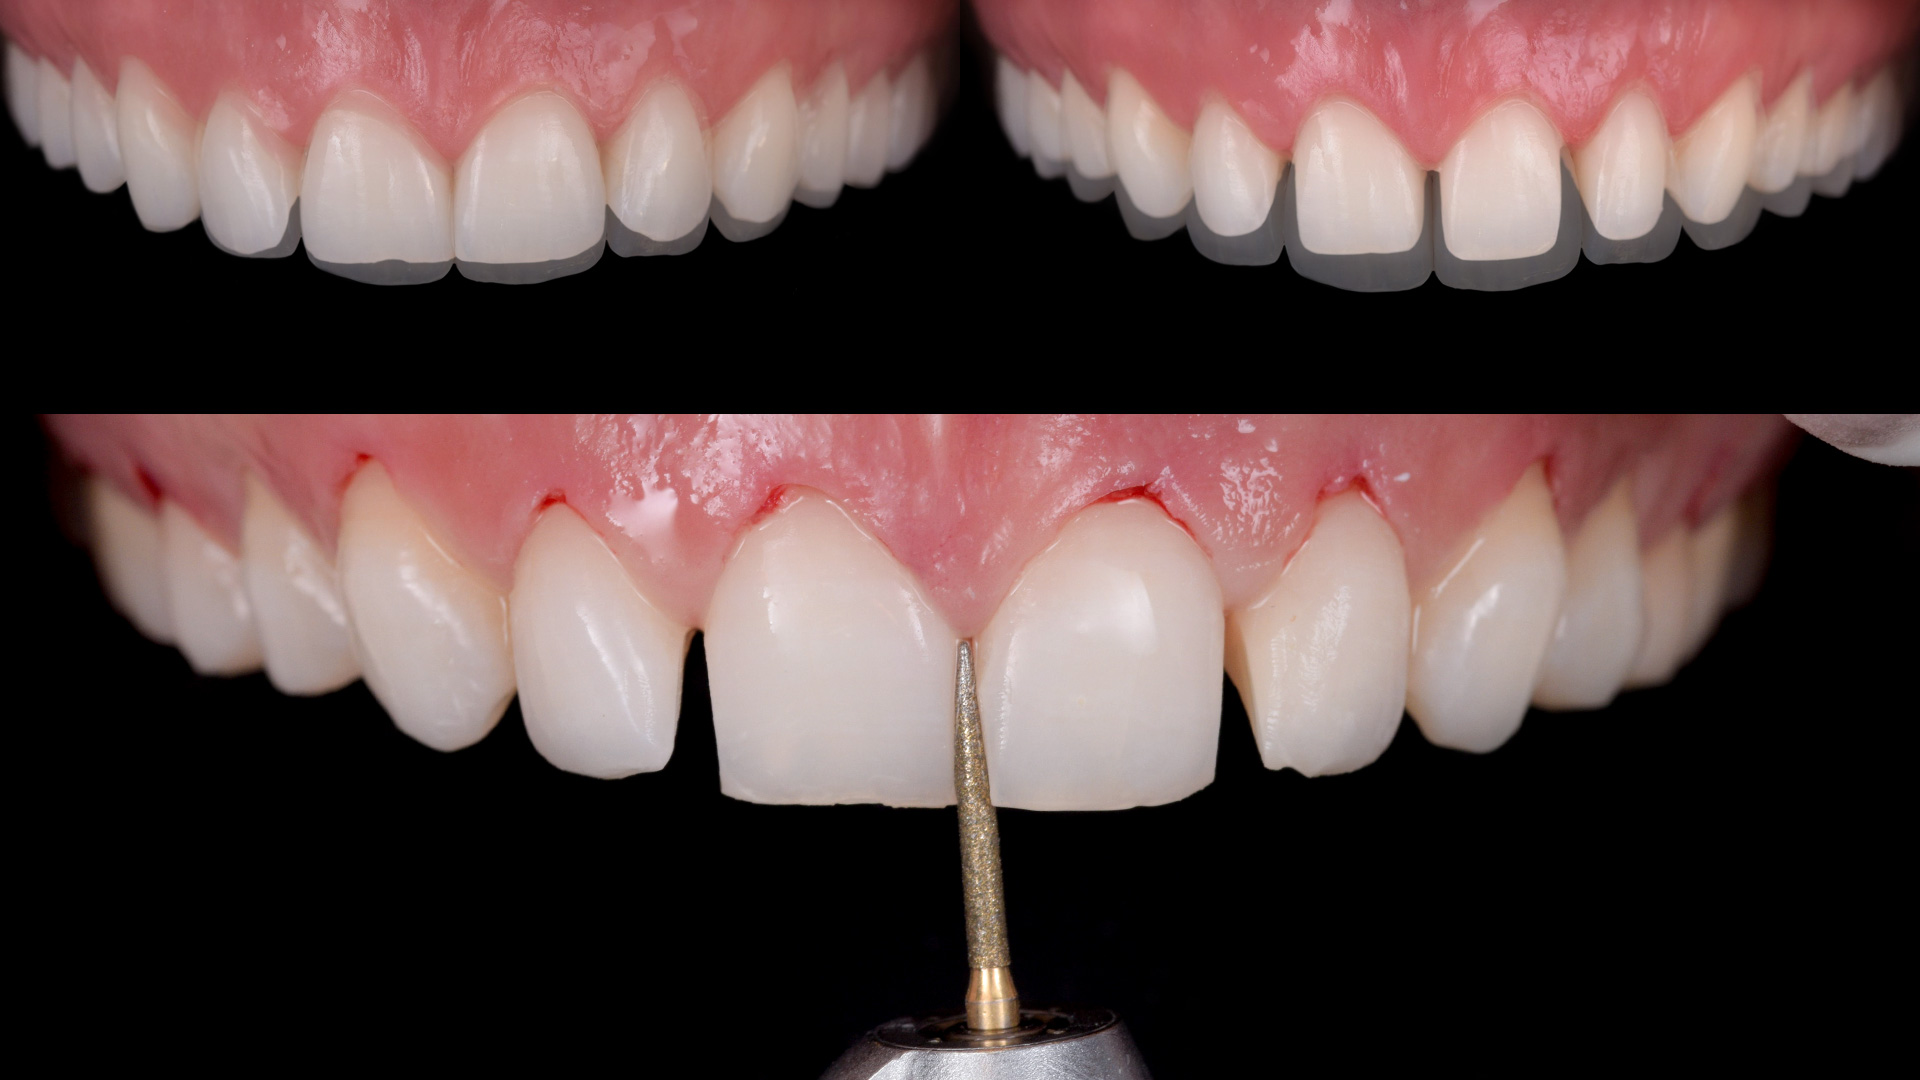
For this case we went for the crown lengthening with the flapless technique
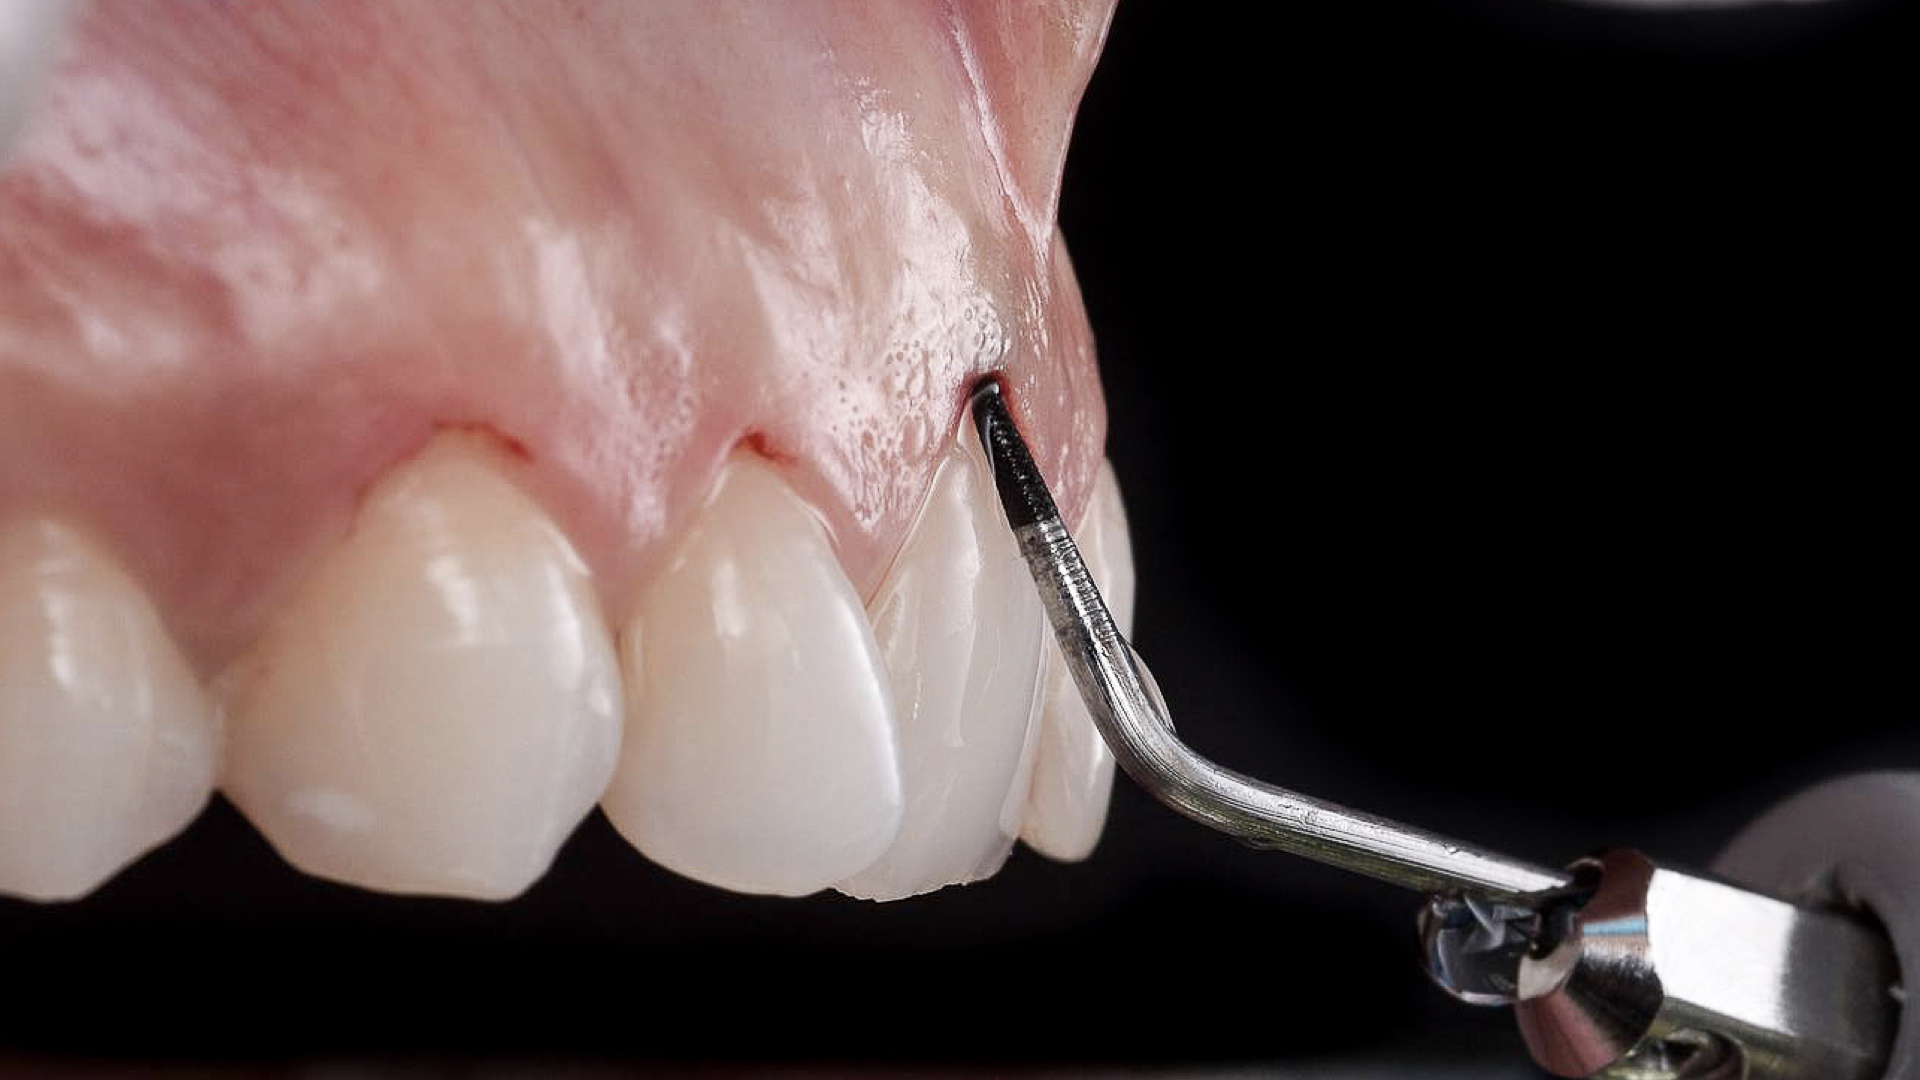
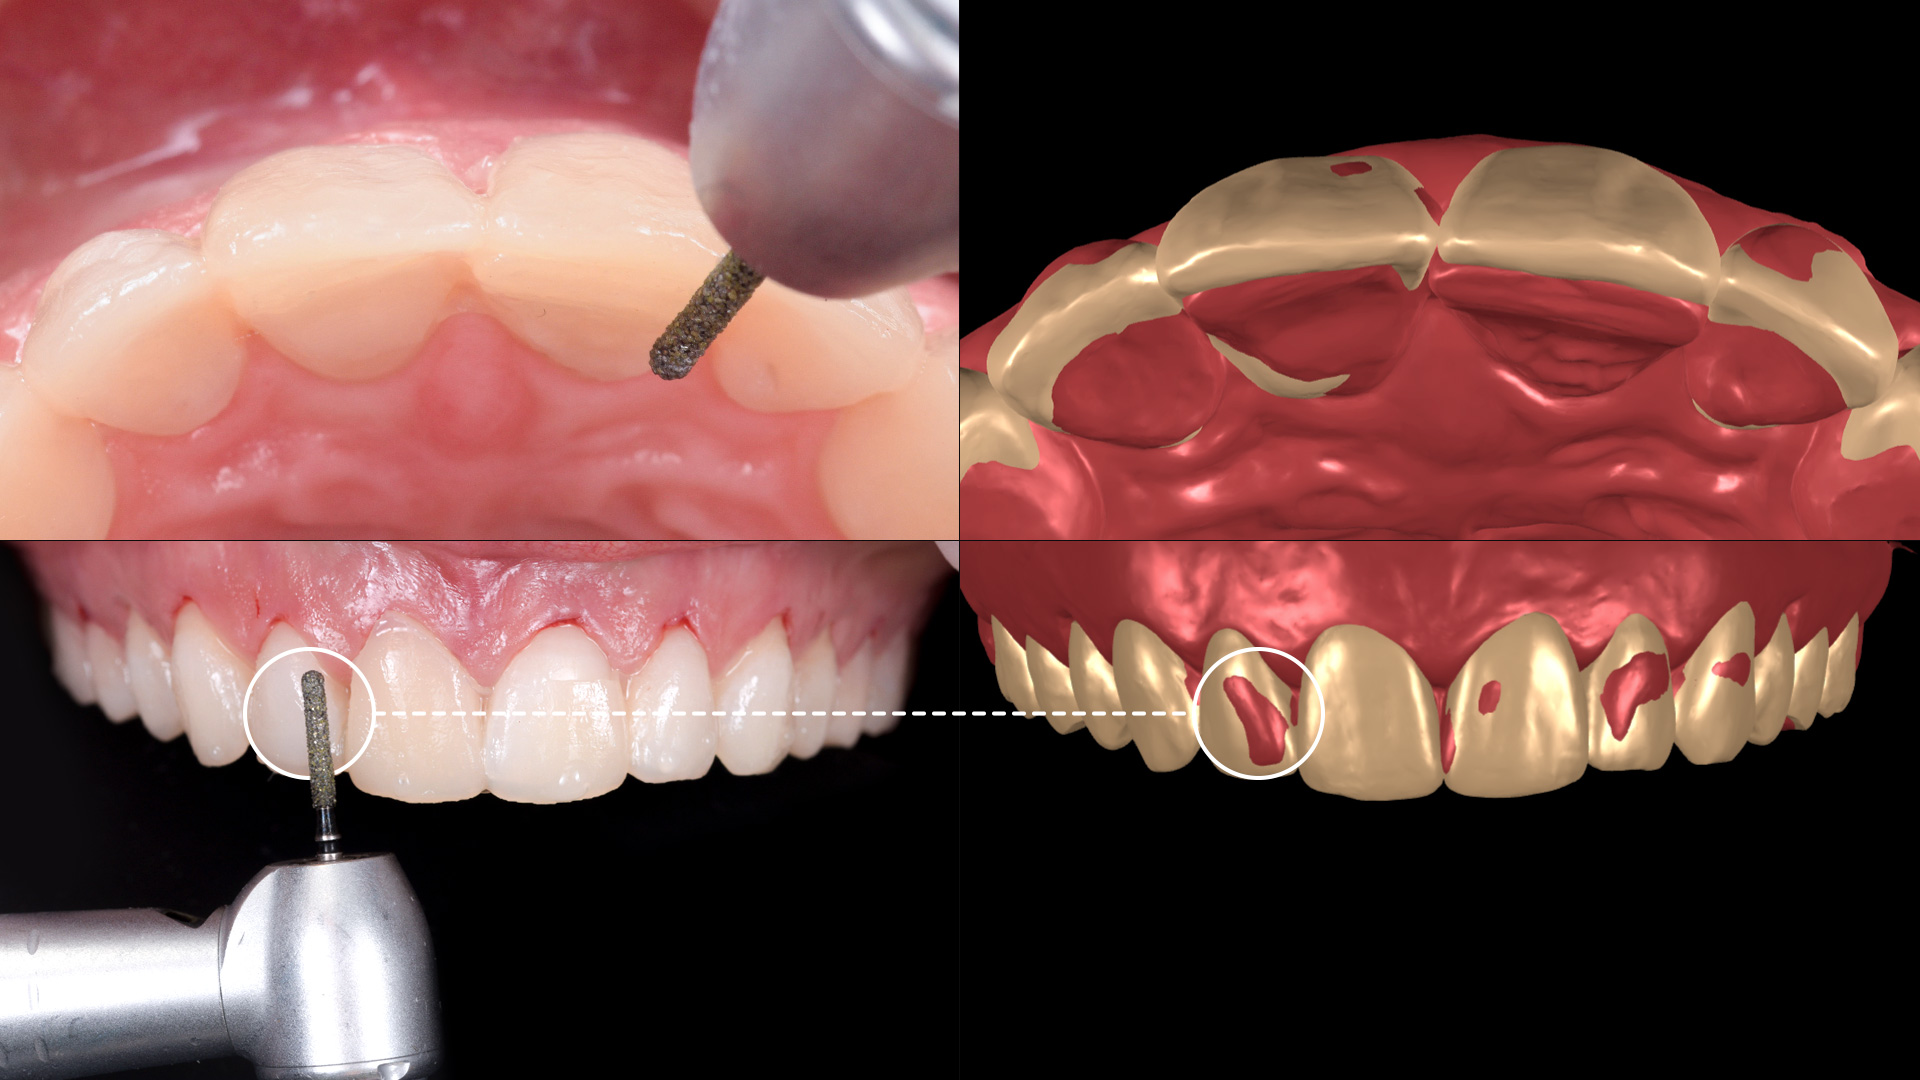
If again you take the initial scan and your ideal design you get what we call a pre-preparation guide. The initial model will go through your ideal design and those red areas you will need to reduce. The way the pre-preparation guide works is you print the ideal model and transfer it in the mouth with bisacryl of a different colour. This patient has a light colour so we used an A3 bisacryl to transfer the model. This way the areas you need to reduce are sticking out of your design so you can just take bur and pre-prep.
Either you do it visually as for many people it’s enough just to look at the picture on the right side and understand where they need to cut or you use the pre-pre guide and play it safe.

This is how you transfer the Ideal design in the mouth and see that the design is no longer on top, but in an ideal relation with the tissue and profile.
The preparation has to be according to this ideal design so you can use a APT or a silicone guide or use your experience and visual sense. The bottom line is that you should aim to have uniform space for the ceramic and a light gradient from cervical to the middle of the tooth and incisal. In this case I have to open the contact areas and cut the teeth because of their position.
So once you prep, the technician uses that information together with the final design to generate the final restorations. We use this flow in order to not touch the restorations because the whole purpose of the process is to preserve the natural shape we initially used. What we do is maybe stain and take care not to glaze too much so we don’t lose structure.
Isolation with ruberdam and try In
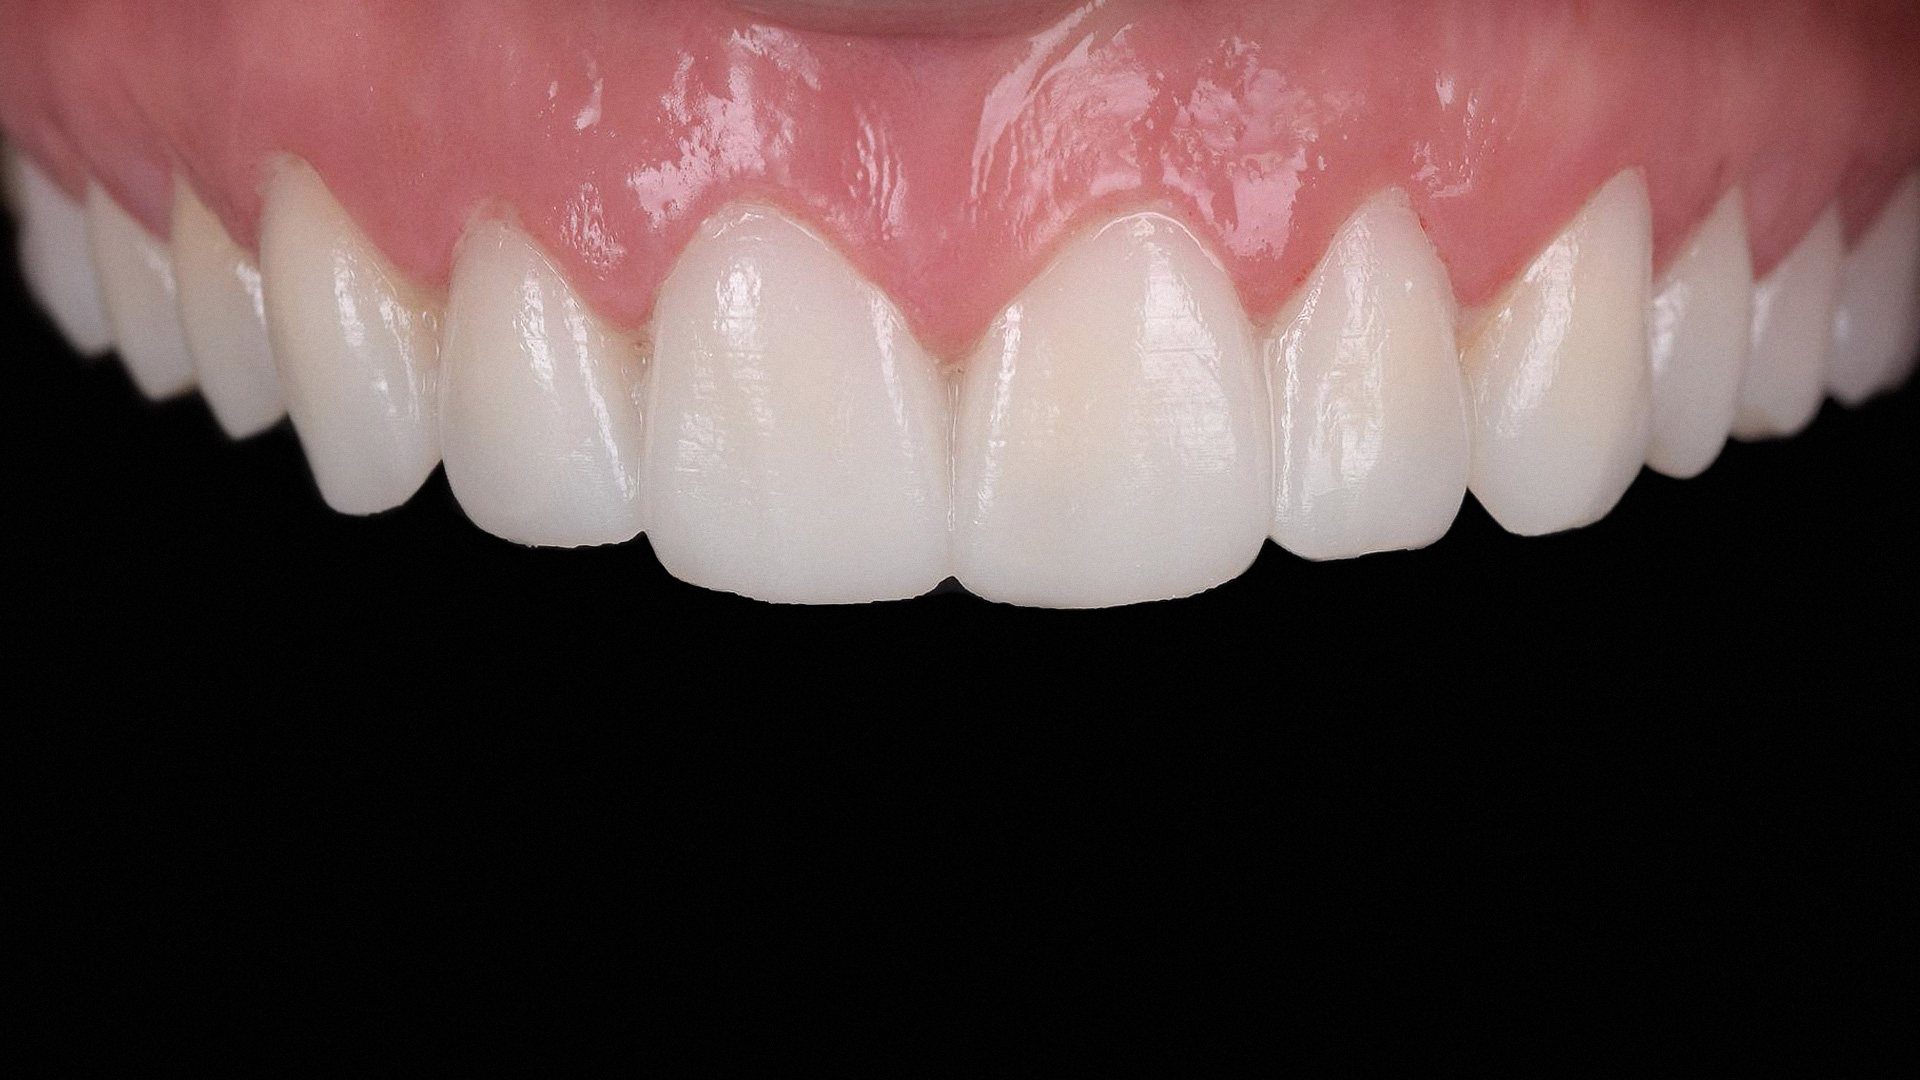
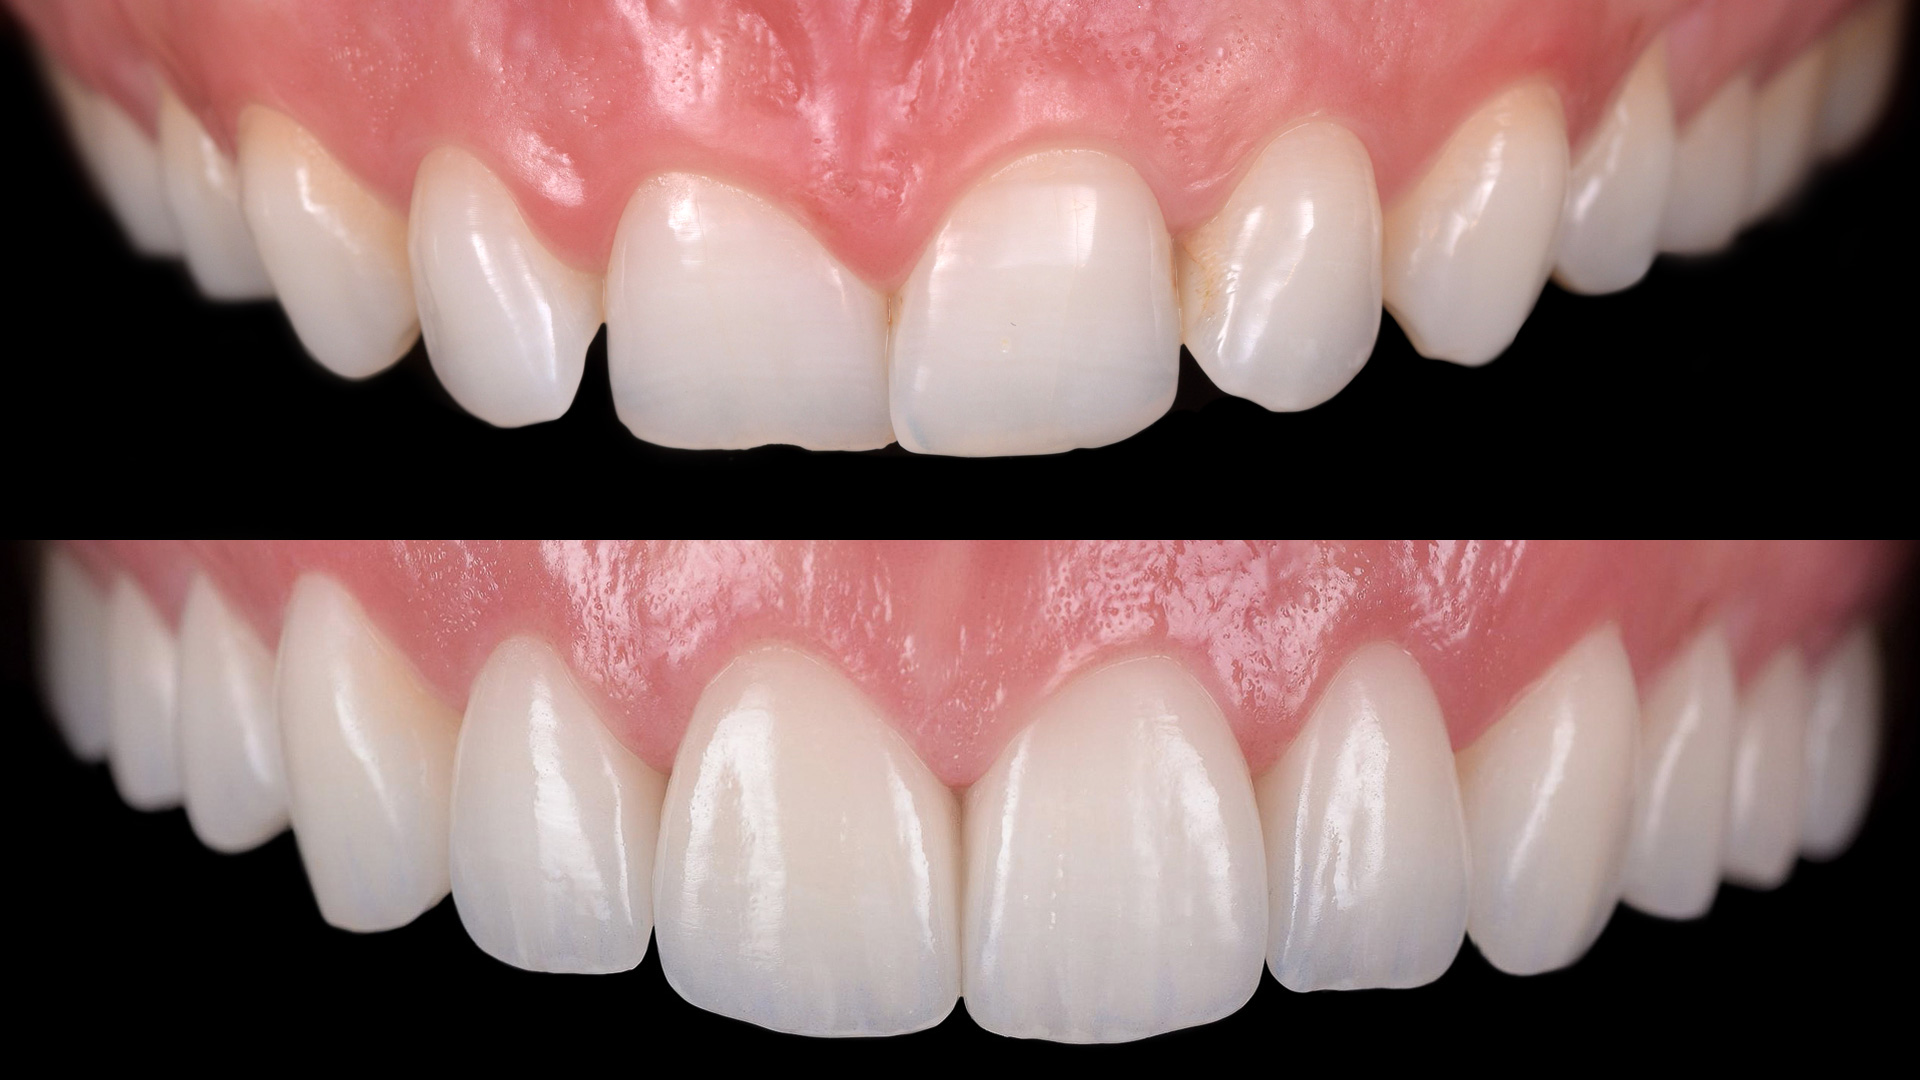
Final result after 3 days

You can see the predictability of copying the shape and for this it is important to explain how we achieve it: the surgical and the pros in 99% of the cases is done in the same time. We do this because of something called prosthetic healing. Everybody uses this in implant cases as the best way to heal an implant site is via the final zirconia abutment/ final crown.
The same thing applies for natural teeth and because of the efficiency that we can get with digital, It’s possible to go very predictably through surgery and process in the same day and then you bond and let your ceramics guide the healing of the tissue.
We move the healing period of the tissue and the bone from the middle of the process to the end of the process where to be honest, It makes more sense for it to be. I know it challenges a lot of literature here, but we’ve been doing it long enough to be confident that this is a very solid alternative to existing ones.
This is the final result.